Saturday, January 31, 2015

Saturday Evening Walk in Midtown Mobile

Today wasn't an overly-productive day in our house (unless you consider brunch, nap, and puppy snuggling productive) so we decided to take a little stroll tonight before heading to dinner at a local wine bar. I decided that it would be a great chance to post a few pics of Midtown Mobile, since many times I take for granted the beauty and history this area holds. 


The area where we live is considered the historic district and has some really beautiful homes with intricate woodworking, interesting architecture, and unique layouts that you don't find in homes built today. Every time I pass this one...I'm tempted to knock on the door and ask to see the inside!


Many of the houses are marked with the historical shield which indicates that the home has been certified by the Mobile Historic Development Commission.


Others, while maybe not historical, remain decked out in the spirit of the season!


Even in the middle of January, the trees and flowers are blooming.


There are a number of tour markers on the sidewalks that indicate where important events happened or a historical landmarks are located. We live near marker 29 (I'm not sure what tour it's for) which is the Duffie Oak, the oldest landmark in Mobile....it has its own Wikipedia page for goodness sake!


Home sweet home :)

Thursday, January 29, 2015

Breakfast - Banana Walnut Bread

It's gotten to be that time when I need to do a grocery run to keep our breakfasts healthy and filling...first we ran out of yogurt last week (which is a frequent breakfast item), then we ran out of oats for protein oatmeal earlier this week, THEN we ran out of bread for breakfast sandwiches today. Needless to say, I know what I will be doing this weekend.

So, I decided to start our weekend out right and make some banana bread tonight that would be a great start to our day tomorrow and into the weekend! It's based off the Food Network recipe (here) with just a couple flavor additions.

I start out with the list ingredients, but use one additional banana, half brown sugar, nutmeg, and vanilla extract. 


I mixed the butter with 1/2 cup each brown sugar and granulated sugar. Since I decided to make this recipe last minute and didn't leave my butter out, I microwaved the whole stick for 15 seconds...I know technically that's a no-no, but it's better than waiting for it to soften on its own! :)


I peeled the ripe bananas and smashed them with a fork. Since I freeze my bananas once they're ripe, I had to use the same microwave technique above to get these to thaw...also hence the watery consistency when mashed (even thought I find that it makes the bread more moist!)
\

As I mentioned, the Food Network recipe only calls for cinnamon at this point, however I also added 1 tsp. vanilla and about a 1/4 tsp. nutmeg. I use freshly grated nutmeg so the flavor is strong...if you're using ground nutmeg you may need a little more for the flavor to come through.


Once the dry ingredients and the wet ingredients were ready, I added them to the mixer!


...this is also where I find the mixer shield to be of great use so I don't end up with flour all over me and my kitchen.


Lastly, my final additional ingredient was a cup of chopped walnuts. I have also used walnut topping in past batters which has a less pronounced consistency but still tastes great! You could also use pecans or hazelnuts if you prefer a different taste, or you can omit the nuts completely!


Once the batter was mixed it went into the pan...


...and came out golden brown and crispy! (I had to bake mine for an additional five minutes because of the water in the bananas...you can bake it more or less depending on how "gooey" you like your banana bread)


I know it says to let it cool for 15 minutes before cutting but I couldn't resist...turns out banana bread makes a pretty tasty dessert too :) Can't wait to enjoy a hot piece with my coffee in the morning!


Monday, January 26, 2015

Dinner - Oven Baked "Wings"

Tonight was one of those nights that I was craving beer and wings...maybe it's the atmosphere of the upcoming Super Bowl, or possibly that it's just one of my favorite meals ever, but I decided to try the healthy route and oven bake them and oh man...was it yummy!

I had some leftover drumsticks (hence why I title this post "wings") that I decided to coat in spices and bake in a super-hot oven, then lather with wing sauce to satisfy my "wing-tooth." Hehehe...see what I did there? :)

For my spice mixture, I used cayenne pepper, smoked paprika, jerk seasoning, parsley, salt, and pepper. I was going for a classic chicken wing, however if you prefer something less spicy you could choose a different combination of flavors that more closely matches your wing preference!


I mixed the spices together in a medium bowl, then coated each drumstick liberally with the mixture...to make this part easier, I'd recommend using one hand as a clean hand to sprinkle the mixture onto the meat, and the other as the dirty hand to turn the wing around to make sure it gets fully coated.


After the wings were coated, I placed them onto a baking sheet to put in the oven. As you can see, I actually set a cooling rack on top of the baking sheet to make sure they were crispy all around, however you could also just turn the wings throughout the baking process to be sure they crisp up nicely. 


Once the wings were in the oven, I quickly threw together some potatoes and onions for a side, I diced three potatoes and sliced a medium onion, adding it to a 9 x 13 pan with some olive oil, salt, pepper, and a sprinkle of cayenne. I added these to the oven to bake with the chicken wings. 


After baking for nearly an hour, I pulled all the ingredients out of the oven to cool. The drumsticks had a nice crispy coating on them, which was the perfect base for smothering the wings with wing sauce. (While I prefer my wings super saucy, you could reduce or completely eliminate the amount of wing sauce you use...completely at your discretion!)


The grocery store was out of Franks Wing Sauce so I went with Louisiana brand...typically I'd say stick with Franks because it's more true to the wing flavor I like, but this was actually a pretty good substitute!


 These wings, combined with some creamy ranch and a cold beer, definitely hit the spot tonight! 


Oven Baked Chicken Wings

Ingredients:
- 1 tsp. Cayenne Pepper
- 1 Tbs. Smoked Paprika
- 1/4 cup Jerk Seasoning
- 1 Tbs. Parsley
- 1/4 tsp. Salt and Pepper
- 6 Chicken Drumsticks
- 1/4 cup wing sauce

Steps:
1. Preheat oven to 425 degrees
2. Mix all spices together in a medium bowl
3. Coat the chicken drumsticks generously with the spice mixture
4. Place drumsticks on a baking sheet
5. Cook for 30 minutes at 425, then reduce temperature to 375 and cook for an additional 15 minutes


Sunday, January 25, 2015

First Camping Trip of 2015!

Although most of my friends and family in Indiana know that I tend to hate the southern heat, there are a few times a year where it proves beneficial that I live 500 miles closer to the equator...such as when Andrew and I can plan a camping trip in mid-January. The forecast was sunny and mid-fifties all weekend so we thought it would be a perfect opportunity to break out the tent for the first camping trip of the year!

We went to Blakeley State Park, which is a small park in near Spanish Fort, Alabama, and used to be the site of a tiny town called Blakeley (you can read more about the park's history here), but it's now a rich delta with over 10 miles of hiking trails and fishing docks. We decided to test out some of the backpacking gear that we have acquired the past few months in preparation for our trip coming up in March and spent two nights in a primitive campsite, braving the elements.

Obviously Andrew is my pyro, so he was in charge of the fire the whole weekend. :)


Between keeping me warm with a fire and tent, I'd say I found a keeper!


For anyone curious, our tent is the Coleman Hooligan 3 and is perfect for the two of us and the pups. It has a "porch" area that can close up and house dirty shoes (or dirty dogs!) without tracking anything into the actual tent. The only downfall is that all four sides are mesh so it can be a bit chilly if you don't have a good sleeping bag, but since we were wanting to test our "20 degree rated" backpacking sleeping bags, we didn't mind the chilly nights!

Of course, my duties while camping included making the meals...I wanted something that would keep us full but use minimal ingredients since we wanted to keep packing light. 

For our dinner the first night, I made walking tacos..unfortunately it was dark by the time we started eating so I didn't get any pics, but what I did was cook taco meat the day before we left and froze it, then brought individual bags of Fritos, cheese, and salsa. We warmed the meat over the fire, spooned it into the bags of Fritos, added cheese and salsa and done! - it was a great first night meal. 

For our breakfast on Saturday, I pre-made protein oatmeal (find that recipe here). Since I use instant oats in my recipe, we just poured boiling water into the oatmeal and it was the perfect hearty breakfast before we headed out on a hike with the pups.

(I didn't get any pics of the pups hiking this weekend, but here is a preview from a couple nights ago...yes, we pack-muled our dogs. It's only fair that they carry their share of food and water! Hehehe)


Ok back to our camping trip...Saturday night was our bigger meal since we had another couple join us, so I thought a "hobo meal" would be a great option. If you have never had a hobo meal, it is only called that because the point is to add random ingredients together and cook them over a fire...I promise it is so much more yummy than it sounds. For my hobo meal, I used five potatoes, one onion, one can of pineapple chunks, and a pack of summer sausage...I'm telling you, it's the easiest camping meal ever and serves a crowd. (If you were feeding more people or wanted a different variation, you can certainly experiment with other ingredients too...you could use veggies such as carrots, mushrooms, green peppers, or cabbage, or you could use a different meat such as shrimp, steak, or chicken!) 

To assemble my hobo meal, I chopped the potatoes into half inch cubes, thinly sliced the onion, and cut the sausage into small slices. I split the ingredients evenly onto two large sheets of aluminum foil (about 2 feet long each) and divided one stick of butter between the two packets, then generously sprinkled with salt and pepper. 


I wrapped the packets tightly together, adding another layer of foil to make sure nothing leaked, then placed them directly over our campfire. They needed to cook for at least an hour, turning over about halfway through to make sure everything cooked evenly, so I figured it was a great time to help gather wood for the fire.....and have a couple beers with friends :)


Unfortunately it was too dark for a good picture once the food came off the fire, but the onions had such a nice caramelization from the butter and sugar from the pineapples, and the summer sausage just added a perfect kick to the dish. This dish easily fed five people and even had a few scraps left for two begging pups! We had a little salsa left from our dinner on Friday so we used that as a dipping sauce. Ketchup would be great with these ingredients too...if I had remembered to bring it! Oops!

Overall it was a super fun weekend for our family that has resulted in two tuckered Aussies and two tired humans...I'm sure we'll be doing it again soon. For now though, I'm going to join my family on the couch for a Sunday nap! 


Tuesday, January 20, 2015

Weekday Breakfast - Protein Oatmeal

Sorry to add a second breakfast post in a row, but as my favorite meal (and the most important meal of the day!) I thought it would be ok :) Since yesterday I talked about my weekend morning fuel, I wanted to share one of my weekday favorites. It's so quick and easy and can be prepped for a week or two in advance...even though usually I'm not that proactive and am throwing it together while running out the door!
 
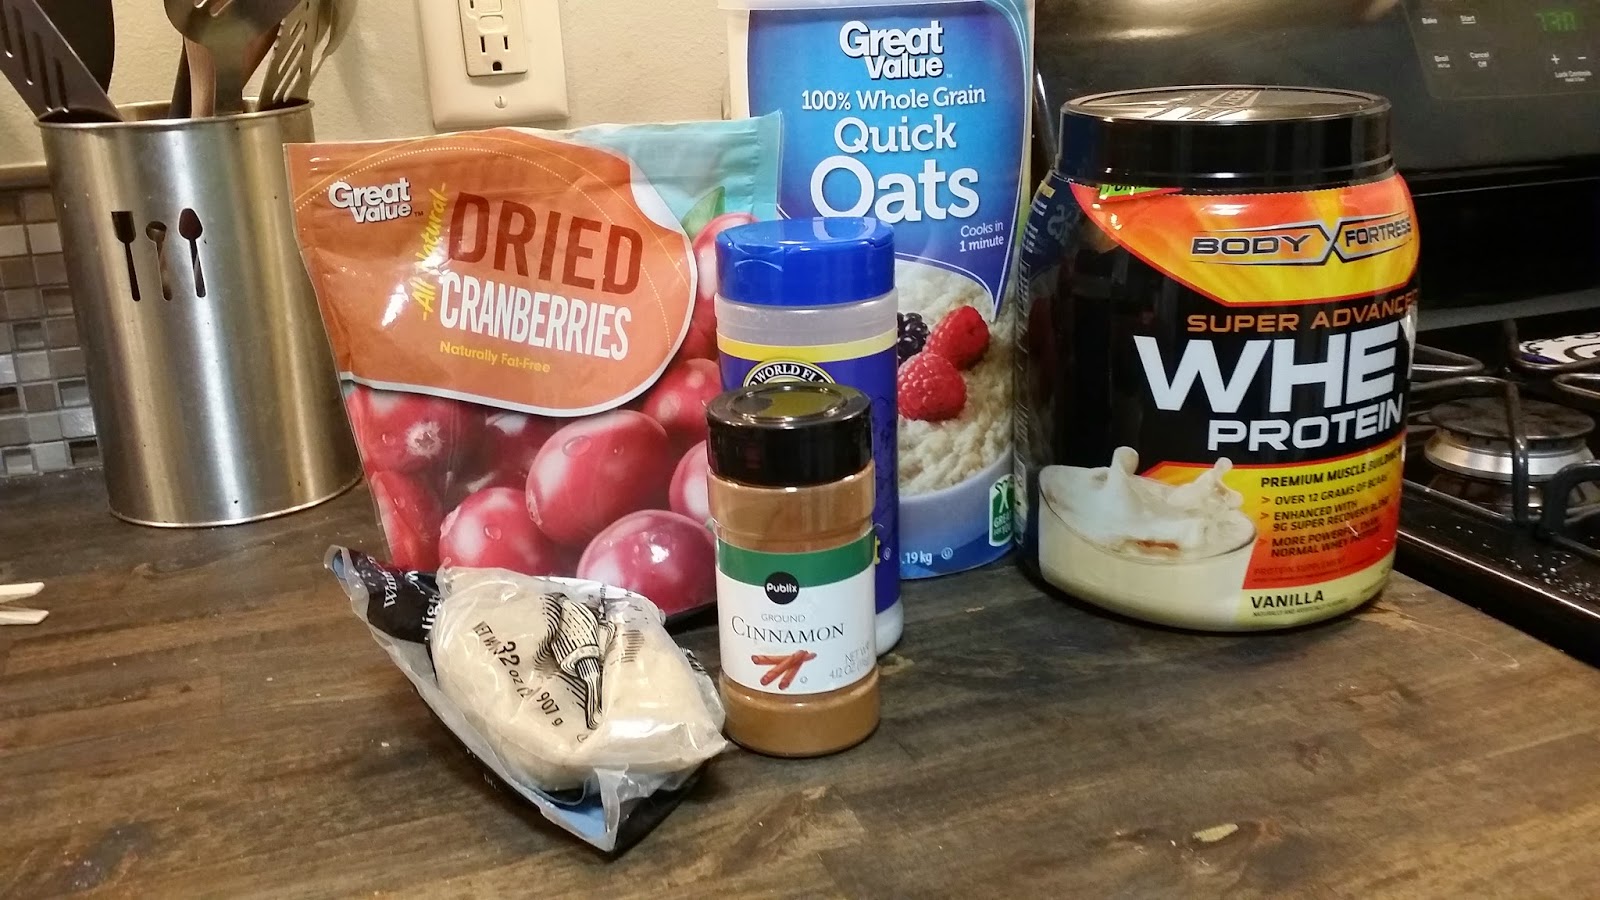
The basic ingredients I use are instant oats, protein powder, brown sugar, cinnamon, salt (yes, salt....just not much!), and some sort of dried friuts or nuts.   
 
 
I start by adding about a 1/2 cup of instant oats to a microwave safe bowl. I then add about a 1/4 cup vanilla flavored protein powder, 1 tablespoon of brown sugar, 1 teaspoon of cinnamon, and a pinch of salt. Throw in a handful of whatever fruits/nuts you would like, and mix it together.

 
Add enough water to cover the mixture and stir. This step is VERY important, as the protein powder will cook into a big, lumpy chunks if it's not stirred extremely well. Put it in the microwave for 1.5 - 2 minutes, just until the top begins to bubble up, and you're done! I usually wait to do this step until I'm at work so I have hot oatmeal...to cool it off you can add an ice cube and stir it around until it's completely melted into the oatmeal.

 
You could always prepare these ahead of time and put them in ziplock bags too...either way, this is a great way to start your day!


Monday, January 19, 2015

Weekend Breakfast - Conecuh, Egg, & Cheese Sandwich

Yesterday I had several morning errands to run, and wanted to fuel up before heading out! Luckily I had some leftover conecuh sausage from my dinner the other night (to read more about that click here) which was the perfect start to my day. 

I started with a few simple and staple ingredient categories...eggs, meat, and bread. As I mentioned, my meat was conecuh sausage, so to make up for the calories I used Flat Out sandwich thins. Orrrrrr...it might have been because they were about to go bad and I figured they would help make the sandwich more portable. I'll never tell :)


I first chopped the sausage into fine pieces and added it to a skillet. I didn't use any oil because the sausage was fatty enough, and soon enough it was sizzling away.


I then cracked four large eggs into a bowl (I was making these for my hubby and myself...if it's just for one I would recommend only using one or two eggs). I added a couple tablespoons of milk so the eggs would be extra fluffy and some freshly cracked black pepper for extra flavor and whipped this all together for about 30 seconds.


I added the eggs directly to the pan with the sausage and gently stirred until it was cooked through. I sprinkled the cooked egg mixture with cheese, turned off the burner, and covered the pan for about 5 minutes until it was nice and melty.


I spooned a generous amount of egg into each of the sandwich thins. Throw in a hot thermos of coffee and I was ready for whatever the day could throw my way!


Saturday, January 17, 2015

Mardi Gras Tablescape

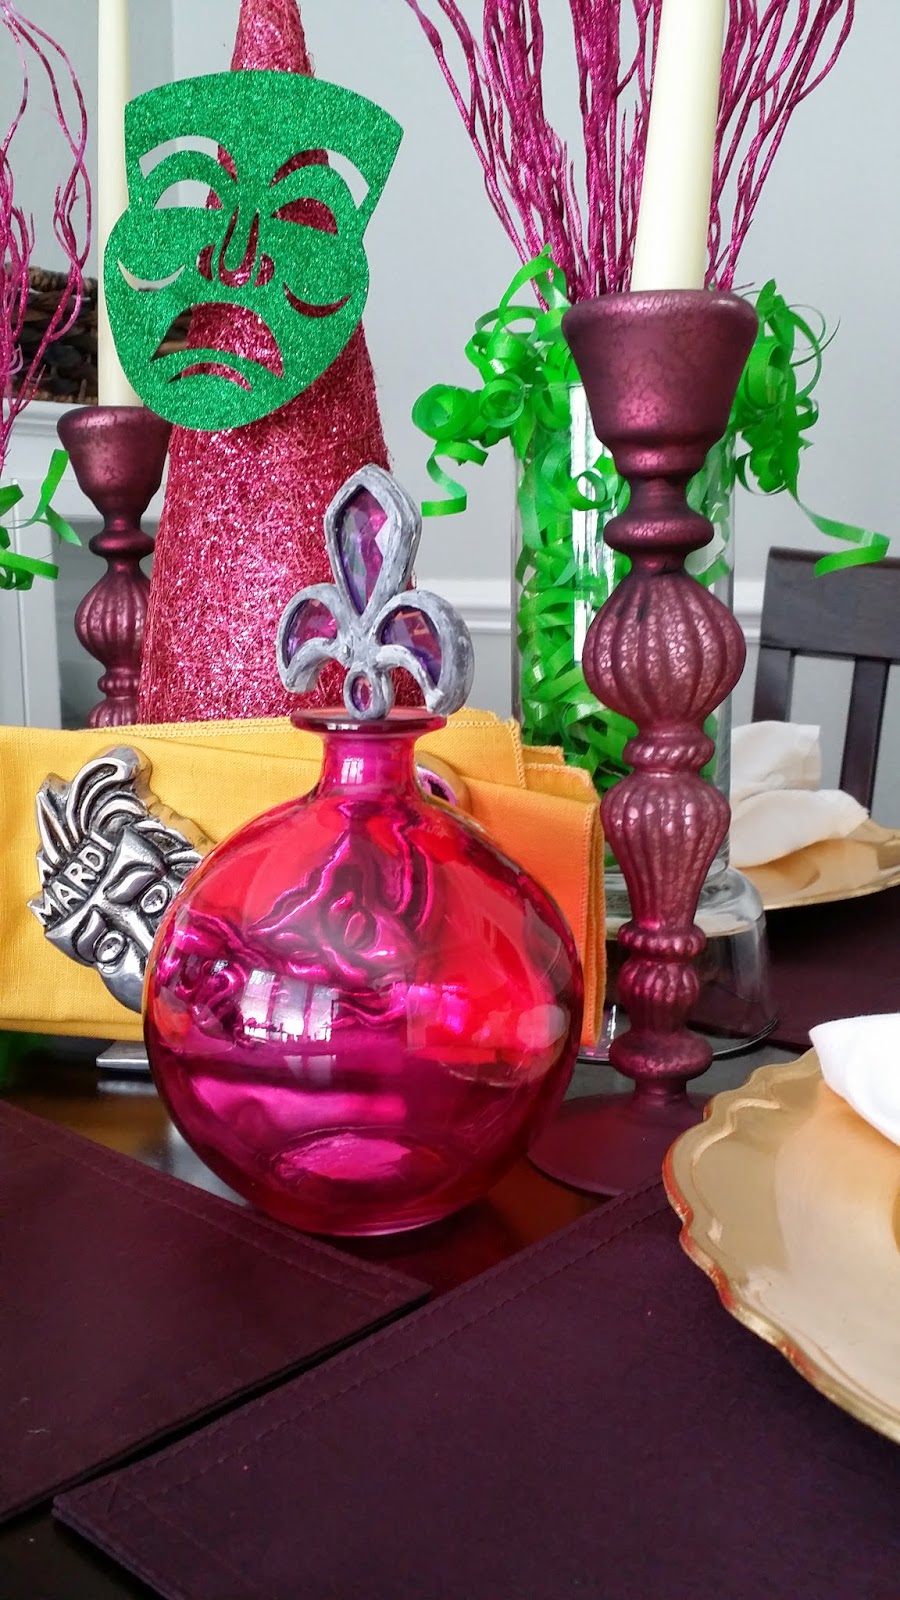
This afternoon I decided it was time to deck the house out in Mardi Gras since it's just a few weeks from the occasion...since my tree is already purple, green, and gold (which you can read more about here) I decided to update my tablescape as well. 


I already had the gold chargers and the vases from previous years, but this year I added some apothecary-like jars and purple place mats from Old Time Pottery, and a napkin holder that I found at Goodwill. 


Overall I'm pretty pleased with the height it brings to the room, and the pop of color really brings out the Mardi Gras holiday vibe.


Enjoy!


Tuesday, January 13, 2015

Dinner - Philly Cheese...Conecuh?

Tonight I had to go grocery shopping after work...in case any of you have never done that, it is the worst idea because not only are you ready to be home after a full day of work, but you're also starving by the time you leave!

Fortunately for me, while I was browsing I found a pack of buns on the clearance rack and decided to make some sandwiches for dinner so I wouldn't have to wait long once I was home. I also decided to make some oven baked onion rings as a side...I've been trying to incorporate more veggies and less carbs into our diet so I thought this would be the perfect option!

The ingredient list on this one is fairly simple: onions, green pepper, and.....conecuh sausage! While I know it would be more healthy to incorporate chicken or turkey into this sandwich, I was feeling some flavor (and I think I might've taken a hint from my stomach while walking down the meat aisle).


I actually started with the onion rings since I knew they would need to bake up in the oven while I prepped the sandwiches. I took one of the onions and chopped it into sections sideways to create the rings. 


I set up my dipping stations in three separate bowls...flour, egg, breadcrumbs. To the flour I added seasoned salt and pepper to taste. I also added some water to the egg mixture so it would be easier to coat the rings. 


I dipped each ring into first the flour, then the egg, then the breadcrumbs so it would crisp up nicely in the oven. To make mine extra crispy, I placed them on a cooling rack set on top of a pan rather than directly on the metal surface. I baked them in a 400 degree oven for 20 minutes until they were golden brown.


Next I started making my sandwiches. First I sliced a green pepper and half an onion into long stripes. I added these to a skillet with a small amount of olive oil (since the conecuh has plenty of oil in it) and added a pinch of garlic salt. 


I then sliced two links of conecuh into small pieces so it would be easy to bite off when on a sandwich. You could also add these as whole pieces and serve this more hot dog style if you like. 


I continued to let the veggies simmer for about 15 minutes until they were soft. I toasted a bun for the sandwich while I was waiting for everything else to be done by spreading a little butter on the bottom and setting it on a hot skillet. 


I topped my sandwich with some spicy brown mustard and muenster cheese which melted nicely over the hot filling. Paired with a heaping stack of onion rings, I'd say this dinner was a success!


Oven Baked Onion Rings:

Ingredients:
- 1 medium onion
- 1/2 cup flour
- 1 egg
- 1 cup breadcrumbs
- 1/4 milk or water
- 1 Tbs seasoned salt
- 1/2 teaspoon paprika
- 1/2 teaspoon pepper

Steps:
1. Preheat the oven to 425 degrees.
2. Set up a coating station with three medium sized bowls.
3. To one bowl, mix the flour with the seasoned salt, paprika, and pepper.
4. To the middle bowl, add 1/4 cup of  milk or water to the egg and mix well. 
5. To the last bowl, add the breadcrumbs. Salt and pepper if desired.
6. Slice the onion sideways into four or five ring sections.
7. Separate the rings and toss in the flour mixture to coat.
8. Dip each ring into the egg mixture, then coat with the breadcrumb mixture.
9. Place on a baking sheet and cook for 20 minutes. 


Philly Cheese Conecuh Sandwich

Ingredients:
- 2 large links of conecuh sausage (Hickory Smoked flavor)
- 1 green pepper
- 1/2 medium onion
- 1 Tbs. olive oil
- pinch of garlic salt
- Spicy brown mustard
- Muenster cheese
- Sandwich or hot dog bun

Steps: 
1. Slice the green pepper and onion into strips.
2. Add to a skillet with olive oil over medium heat. Add garlic salt to taste.
3. Slice the conecuh sausage into strips and add to the skillet.
4. Cook for about 15 minutes, stirring often, until vegetables are soft.
5. Put sausage - veggie mixture on a warmed bun, add cheese and spicy mustard.