Wednesday, February 3, 2016

Cheese Poppers - Food Experiment Gone Amazing!

Ok guys...I'm patting myself on the back for this one. Do you ever have one of those recipes where literally all you do is throw together ingredients that are on the verge of going bad, and instead of it being a dreadful concoction it turns into one of your new favorite recipes? Well...this has just happened to me. So much that I'm pretty sure these will be on my list of Super Bowl snacks this weekend. So. Much. Yum.

Let me start by saying that I am slightly a food hoarder. By that I mean I LOVE when my fridge is full, particularly of fresh ingredients, so that I can let my inspiration go wild on what to make for dinner. However, that also leads to many last-minute scrambles where I try and use everything up before it goes bad, which is exactly the mess I was in when I made what I'm calling cheese poppers. 


It started out with a few cheeses we'd bought a couple weeks ago for a wine and cheese night...cheddar, Camembert, and goat cheese. Although I loved each of these little cheeses dearly when we bought them, there are only so many wine and cheese nights for two you can have before you are ready for a change. So, I decided that I would somehow combine them with some canned biscuit dough (also about to go bad!) and see what I could come up with. I had very low expectations for myself but was soon to be pleasantly surprised!


I decided to keep each of the cheeses separate since they had such strong flavors and would simply add some complimentary flavors to add volume. To the cheddar I added a little grated parmesan, to the Camembert I added strawberry jelly, and to the goat cheese I added roasted pineapple and habanero sauce.


WHICH...let me digress...was a Christmas gift from one of my co-workers, and has become my newest condiment addiction. The texture is almost like a salsa, but the flavor is out of this world...the pineapple gives it sweetness with a spicy kick from the habanero. I promise it will be featured in many a future recipe!


But back to my cheeses...to each mixture I also added a couple tablespoons of flour so it would bind a little better. I zapped the cheddar and Camembert in the microwave for about 30 seconds so they would soften, and stirred the mixtures together until they were all fully combined. At this point in my recipe I was still a bit unsure of how good these would be but kept going....


Once I had halved each biscuit onto a sheet of waxed paper, I spooned a heaping tablespoon of the cheese mixture onto each one, and then proceeded to simply pick them up and put them in a greased muffin tin. 


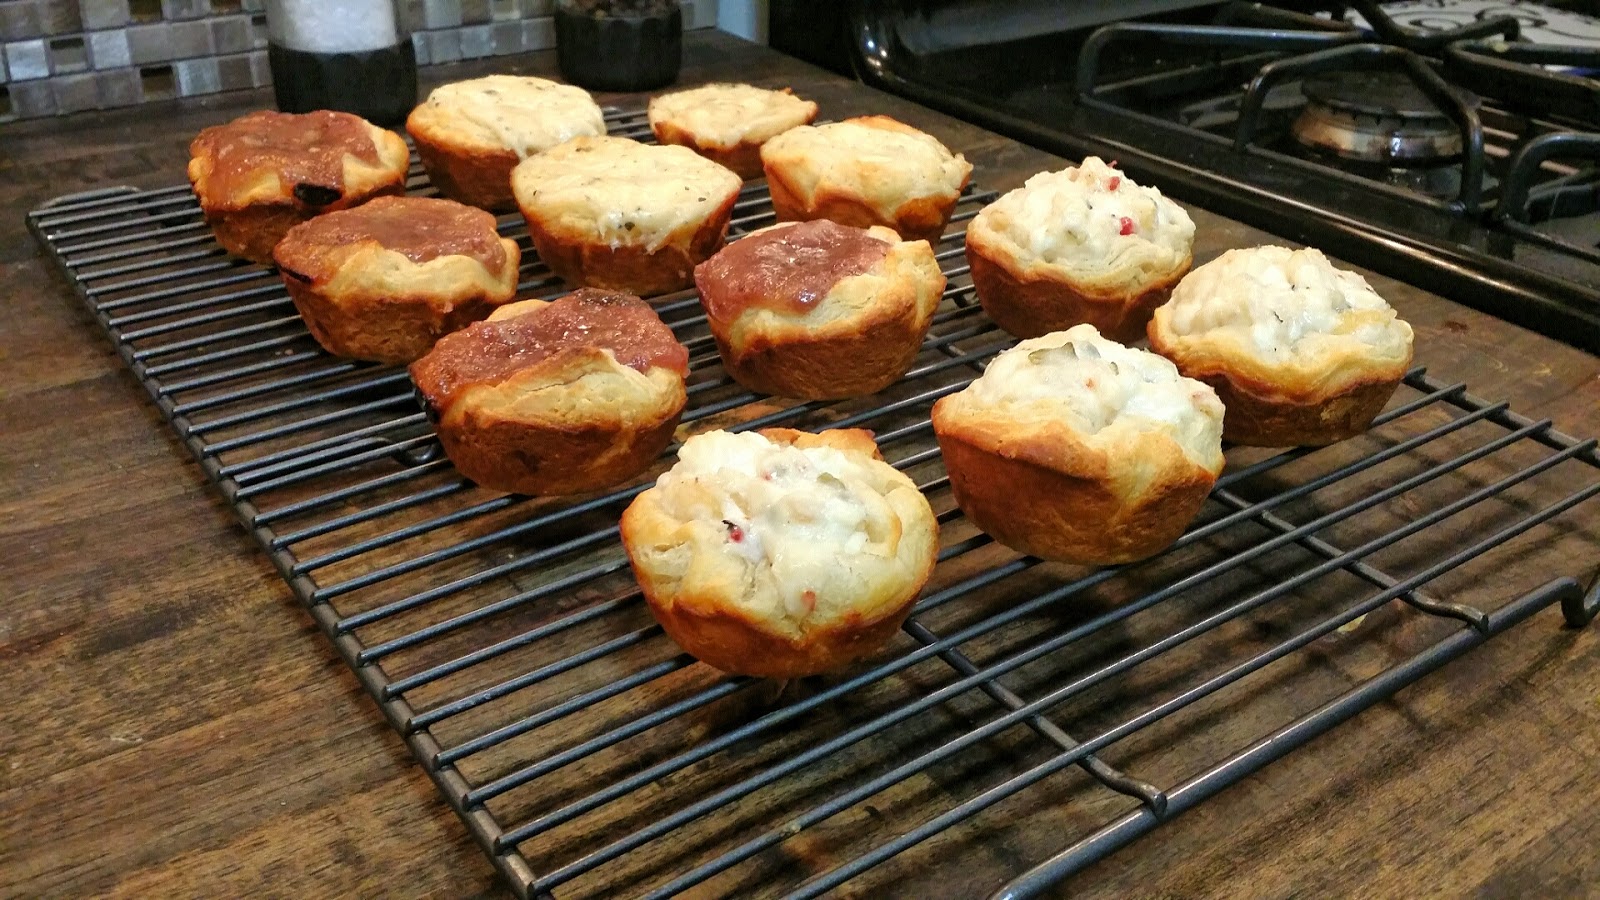
I put them in a 375 degree oven for 12 minutes and they came out looking golden and gooey...I was starting to get excited about this recipe since they smelled so good...they just had to taste good too!


And they did not disappoint!! My favorite was the goat cheese popper because when cooked it almost reminded me of cheesecake but with a little bit of a habanero kick! Andrew liked the cheddar one the best and suggested maybe adding some roasted garlic next time (GREAT idea, hubby!). Next time I'd probably also use a crescent roll or maybe puff pastry since the biscuit was a teeny bit heavy, but when you're looking for a great and easy recipe for a crowd, this fits the bill!


Until next time cheese poppers...

Tuesday, February 2, 2016

Crafting a Desktop Calendar

So I know I say this every month, but SERIOUSLY! How can it be February?!? I feel like the days have just flown by this year, and from the looks of it they're not slowing down! And in saying that, I also realize I'm literally a month late in sharing one of my holiday crafting projects, but I figured better late than never :)

I've recently become obsessed with desktop calendars because they give a desk a unique and modern look, and although my 2015 Purdue wall calendar has sparked some fun conversations when people walk into my office, I thought a new year would be a good time for a new look! So I started the fun job of shopping on Etsy to see what I could find, but quickly became disappointed by the $20-30 price tags, some of which didn't even come with a stand! (and yes, before I have any calligraphers out there get upset by this comment, I do realize many are hand-written so the price is justified...I just didn't want to pay it!) After a few days of not seeing anything that I wanted, I decided to just make one myself, and I'm happy to report it was EXACTLY what I was wanting!


For the materials, I already had card stock, a printer, and an X-Acto wheel at my house, so all I needed was the stand which I found at Dollar Tree.  I decided to keep things simple and use a cream-colored card stock and a gold stand since I have quite a few pictures hanging up and didn't want to busy my work space any more than it already is. I was a little worried about the paper matching the walls too closely, but it seems to stand out with the print on it!


For the font options, I didn't like any of the ones already on Microsoft, so I downloaded the Quickier Demo font...it had a more hand-drawn look that works well for this calendar. I then created a calendar PPT (click to download my template) to easily print out the sheets.

(You'll notice on my template that there are faint lines to help with cutting the pages...those could easily be removed if you have a legit paper cutter!)


To cut the sheets, I started out using the X-Acto wheel, but honestly found it easier to just cut by hand...some of my lines weren't as precise as I would've hoped, so if you're more patient that I am just stick with the ruler and a cutting wheel :) 


Once I cut all the sheets (which measure about 5" x 6") I took them to work where my calendar found a cute little spot on my desk! In love!!


Happy 2016!!! (a month late!)

Sunday, January 31, 2016

Mardi Gras Ball Weekend in Mobile

There's something special about having your family nearby that makes your heart feel warm and fuzzy, especially when you literally live across the country from them! I've been looking forward to having my sister Becca here for WEEKS, and even though I can't believe her vaca has already come and gone, it was so wonderful to see her and her hubby. While they were here, I thought it would be fun to do a little photo shoot for them, especially since they were going to be dressed up for a Mardi Gras ball. (Living in Mobile for a few years now, I think I've forgotten how unique that tradition is and how fun it can be to dress up in a ball gown and dance the night away!)

For their pictures, we drove around the city to a few locations I had in mind...the sun was starting to set which meant the lighting was just right to capture some neat shots. I wanted to share a few of my favorites, but honestly with these two beautiful people, I think they all turned out fabulous! I was also pretty excited that they turned out to well since they were taken with my phone (confession...I don't yet own a DSLR!)

It was such a fun weekend and I'm so happy they made the trip in! Happy Mardi Gras!


Wednesday, January 27, 2016

Breakfast - Apple Crescent Roll Dumplings


It never fails that halfway through the work week, my mind begins to drift towards the weekend and what sorts of fun activities I can look forward to...today is no exception since my "little" sister (I use the term ironically since she's two years younger than me but about four inches taller!) and her husband are coming in town!!! YAY!!! Words cannot express how excited I am! But I digress...

As I mentioned a couple posts ago, my hubby has a new work schedule this year that causes him to have to work on Saturday mornings. And while yesssss it's a bummer when it comes to planning weekend getaways, it's amazing when it comes to the "me" time I have to cook fun foods, do laundry, and clean up the house!! Hence my post last weekend about my cleaning frenzy!

Well this weekend was no exception in waking up and making myself a tasty breakfast, but this week I made a throwback meal to one my mom used to make when I was younger, where she would wrap apple pieces in biscuit dough and cook them in a muffin pan with butter and brown sugar (can I say YUM any louder?!). For my recipe, I used two very simple ingredients that I had in my fridge and tried to recreate as best I could.


First, I peeled, cored, and cut the apple into eight equal pieces. 


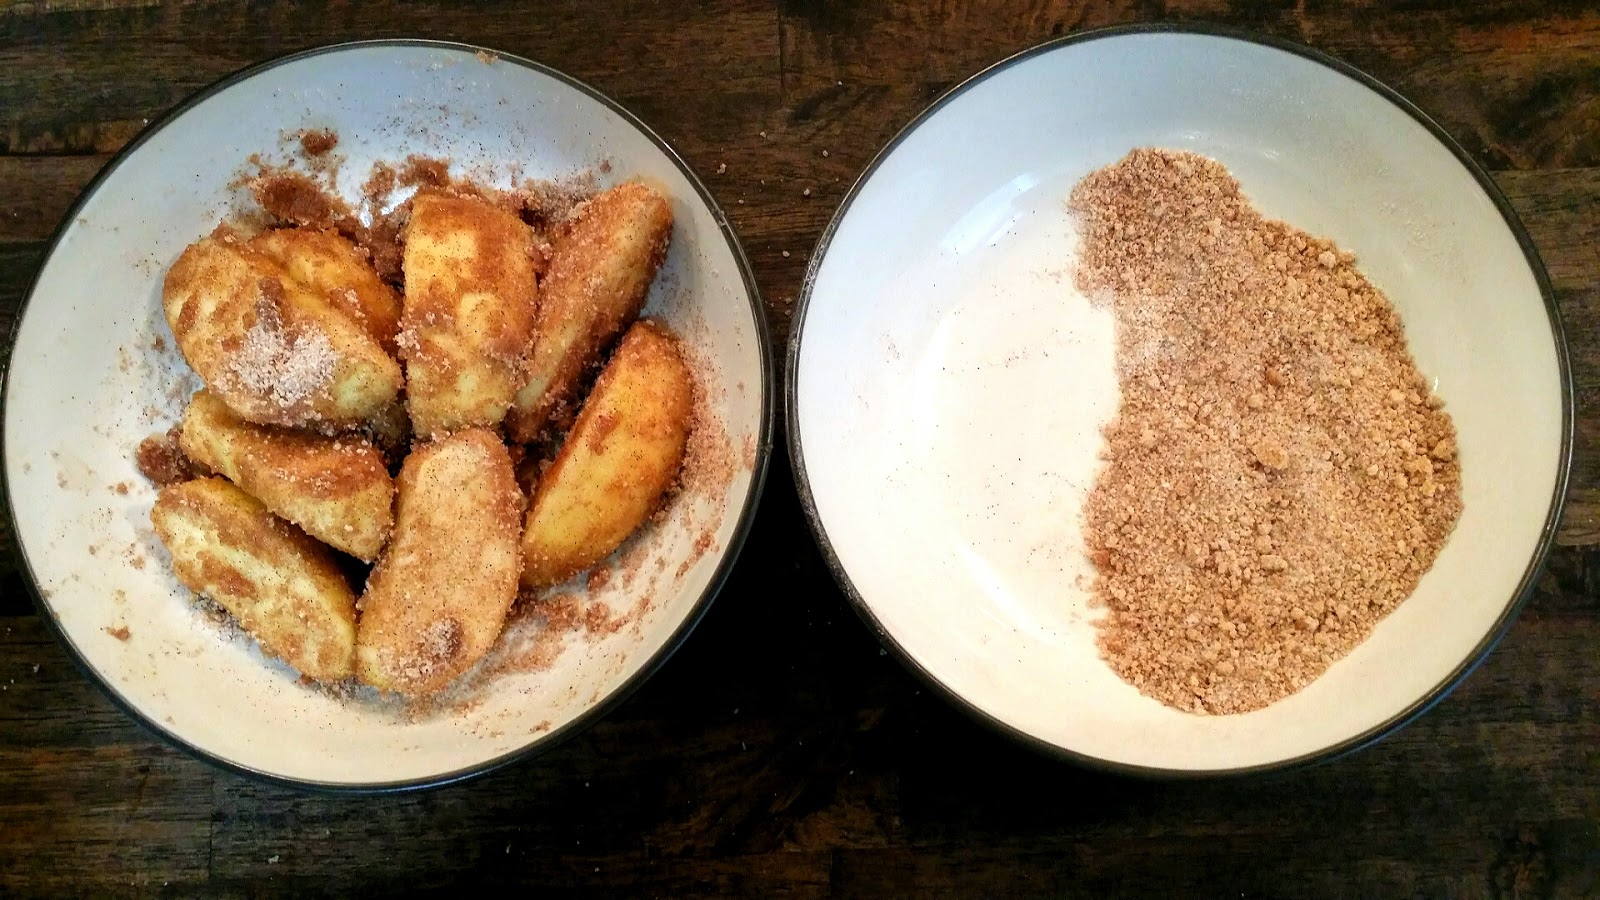
I squeezed about a tsp of lemon juice on them to keep them from browning, as well as added about a tsp of vanilla extract for flavor and additional moisture to grab the sugar coating. To make the sugar coating/dough filling, I used 1/4 cup brown sugar, 1/4 cup white sugar, 1 Tbs flour, and 1/2 tsp cinnamon.


I added half the sugar mixture to the apples and tossed them until they were fully coated with sugary yumminess.


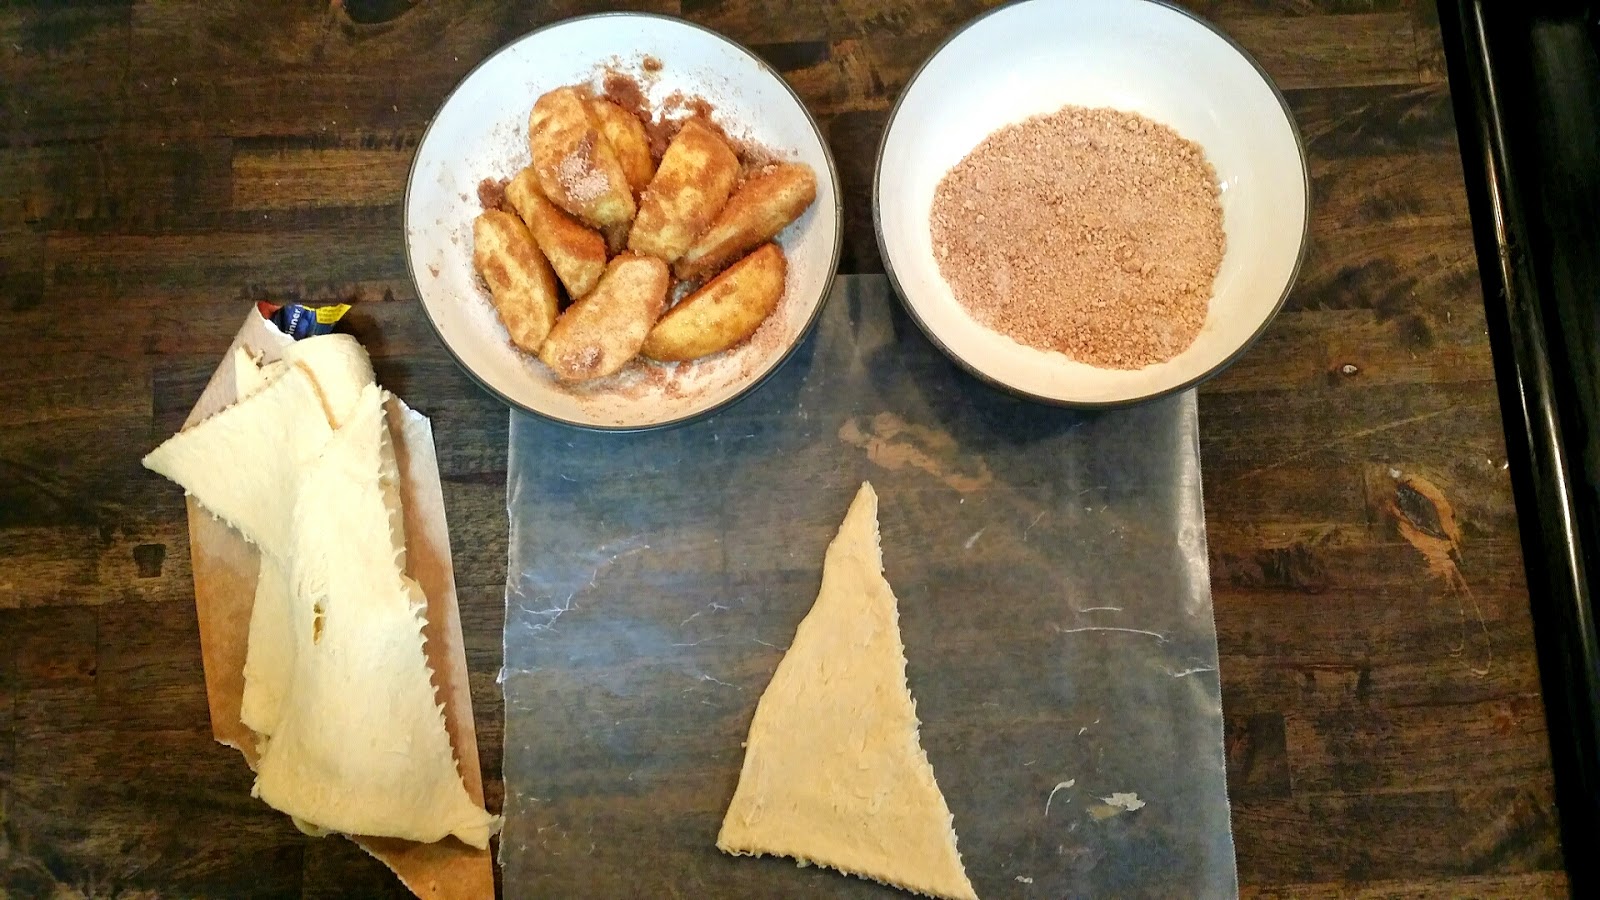
Once I popped the roll of crescent dough and separated the pieces, I started constructing my dumplings!

(Cooking Tip: Since the dough can be fairly sticky, I used a piece of wax paper to roll my dumplings...was easier than trying to grease a pan and much faster cleanup!!)


First,  I sprinkled a heaping tsp of the sugar filling onto one triangle of the crescent roll dough...


...and then added one wedge of apple. 


To roll the dough, I simply rolled it from bottom to top as the instructions said, and then folded in the sides and pinched all the seams so no sugar could leak out.


From there it was just sprinkle, roll, repeat until all 8 rolls were ready to be baked!


I baked them according to the instructions on the package and just used the max time recommended, since I knew the apples inside would slow down the cooking process.


As you can see I wasn't as effective in pinching all the seams as I'd thought, but oh well it just meant I had some crispy caramel to eat with my rolls!

I also made a quick glaze which wasn't really necessary but definitely yummy...for the glaze I used 2 Tbs. powdered sugar, 1/2 tsp. lemon juice, 1 tsp. milk (or in my case caramel macchiato flavored coffee creamer since as I've said before we never have milk in our house), and 1 tsp. maple syrup. I drizzled this all over the hot rolls and forced myself to wait at least two minutes so it could set and harden a teeny bit. 


Such a wonderful start to my day. Now just to make it through the next two days so can have a YUMMY breakfast with my family :) 


Happy Wednesday! 


Tuesday, January 19, 2016

My Weekend Breakfast - Pumpkin Waffles

Do you ever have one of those weekends where you wake up early on a Saturday morning, sun is shining, and all you want to do is....clean? Well that was me this weekend, and not only did I clean but I deeeeeeep cleaned...talking steam cleaned the couch, scrubbed kitchen floors, wiped down windows and baseboards, and did all the laundry (and put it away!!!). I thought because I'd worked so hard, I deserved a little treat for breakfast...AND since I had half a can of pumpkin puree left from my puppy birthday treats last week, AND since I got a waffle maker for Christmas that I hadn't gotten the chance to use yet, I thought what better combination than to make pumpkin waffles?!? Now...I know that technically the fall pumpkin trend is past and really when the pumpkin is substituted for oil it actually makes the waffles healthier, but it was still an amazing breakfast and made me ready to tackle the day!

I started out using Martha Stewart's Classic Waffle Recipe I found online here, but instead of the oil I added pumpkin puree, as well as about 1 tsp of vanilla, 1/2 tsp. cinnamon, and 1/4 tsp. nutmeg (I could've also just used pumpkin pie spice if I'd had any!). 


For the milk, I also made a little substitute that I like to do in baking and use dry milk instead of regular milk...because I'm the only person who drinks milk at my house, it ALWAYS ends up going bad if I keep a gallon or even half gallon around. I've found that keeping a box of dry milk in the pantry works well in a pinch, and even though I don't know that I'd want to drink a glass, it works just fine in recipes! The recipe on the back is for a whole quart, but I find that 1/4 cup of dry milk to 1 cup water is about perfect!


After I added all the ingredients and mixed the batter, I just had to wait for my waffle iron to heat up!


Once the waffle iron was heated up, I "poured an amount of batter into the waffle maker per manufacturer's recommendations"...


Disclaimer: I am aware this is NOT manufacturer's guidelines on how much batter to add to the waffle iron, but I like my waffles a little softer than normal...plus those little bits on the side are perfect to peel off and munch on :)


Once the waffles were ready, I served them with some leftover honey butter I made a few weeks ago (you can check out that recipe here), sprinkled with powdered sugar, drizzled with organic REAL maple syrup, and fueled up for a long day of cleaning!